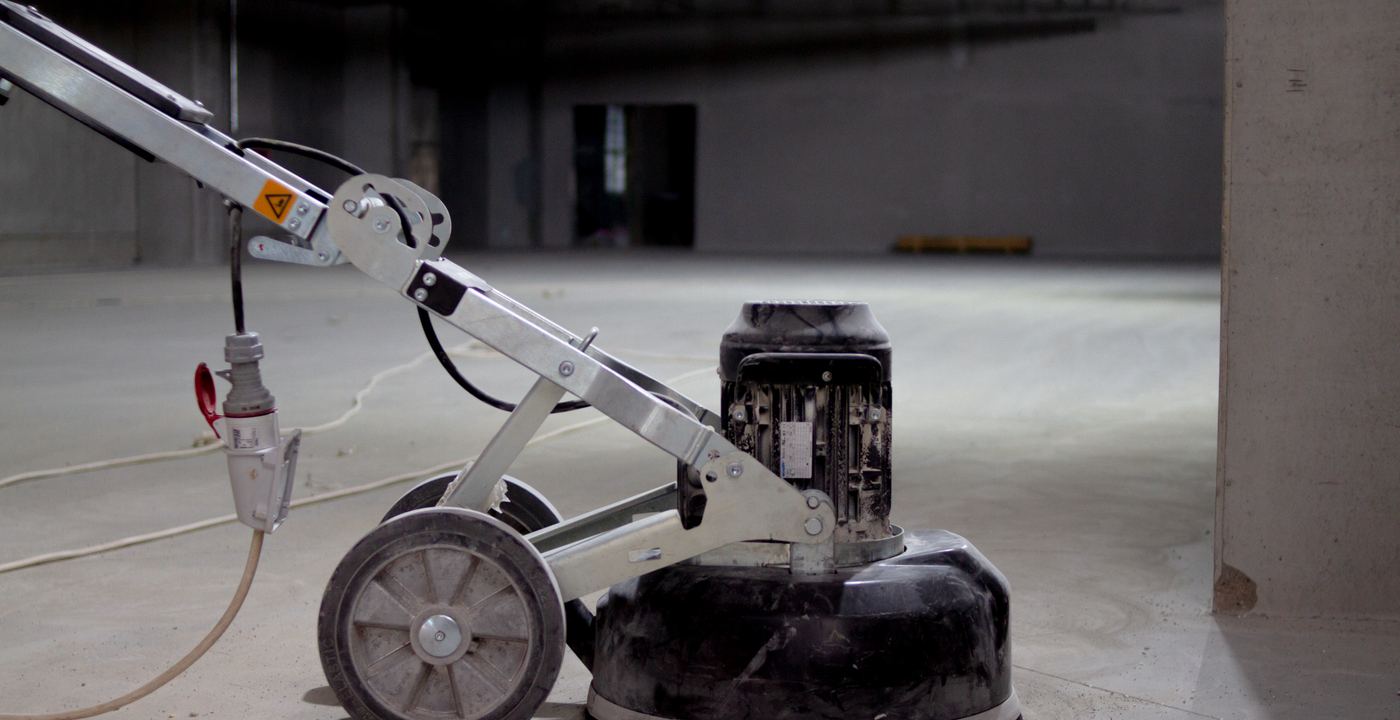
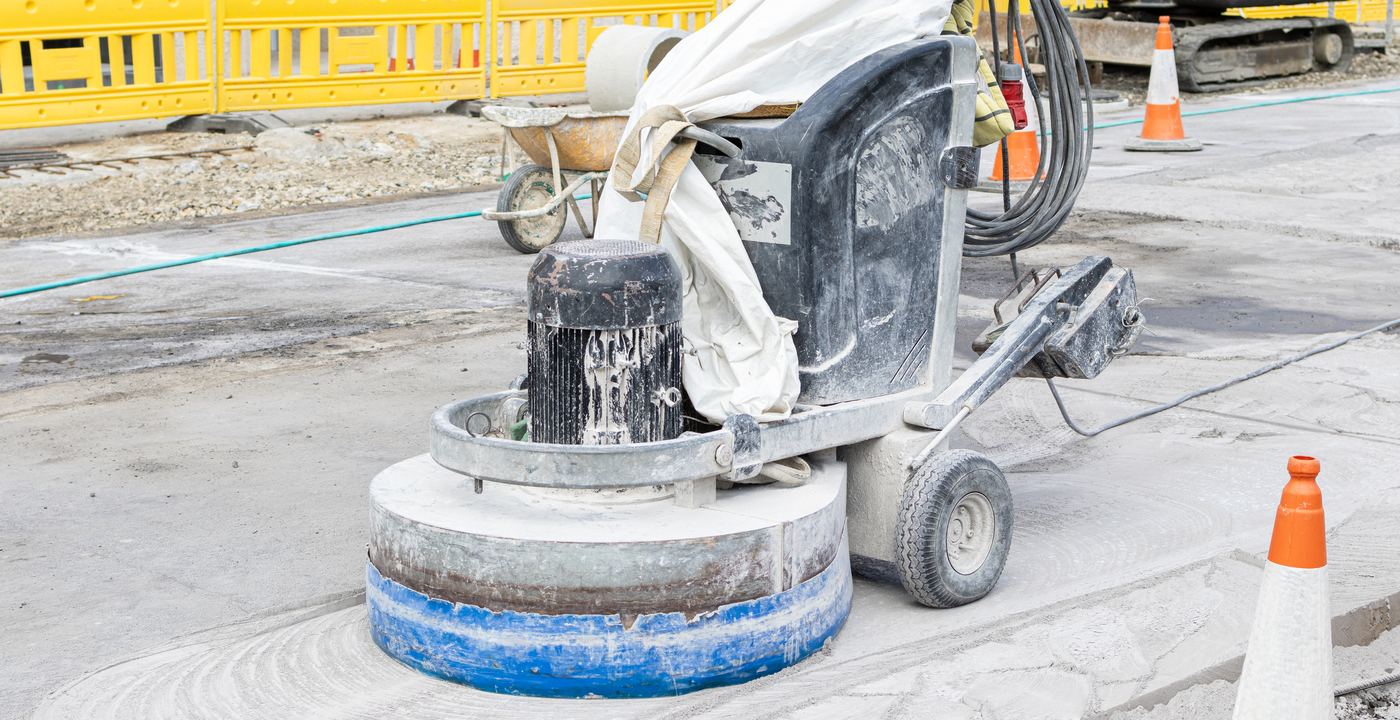
Grind and seal is a two-part job. First, diamond tooling grinds the top of the slab to strip old paint, glue, curing compound and weak surface paste, and to open the pores so a sealer can grip. Then a clear (or lightly tinted) sealer goes on top. The result is a floor that still shows its aggregate, trowel marks and hairline cracks, only cleaner, more even and far less dusty.
It sits between two things people often confuse it with. Polishing refines the concrete itself through finer and finer diamond steps, usually with a hardening densifier, and leaves no film. A coating such as epoxy or a flake system builds a thick, opaque layer that hides the slab. Grind and seal is the thin, transparent option: a film of a few mils that protects the surface without covering its character.
That makes it a practical fit for a lot of DMV floors: a townhouse garage in Springfield, a basement in a Capitol Hill rowhouse, a workshop in Lorton, the back room of a cafe in Old Town. It is not the answer for every slab, and an honest estimate starts with whether it is the answer for yours. This page covers the process, the sealer choices, the limits, the moisture question on older local slabs, and what to ask any contractor before you sign.
The three get lumped together because all of them begin with a grinder. The difference is what happens after. A polished floor is finished by abrasion: the surface is cut, honed and burnished, with a densifier soaking in to harden it. There is nothing on top to wear off, which is why polished floors last so long, but it also means the slab has to be flat, sound and sizeable enough to justify many hours of machine time.
A grind and seal stops the abrasion earlier and replaces the last stages with a sealer film. That is why it forgives more. Patched areas, mismatched pours, old stain ghosts and rough spots that would show through a polish can sit under a sealer and look intentional. The cost of that forgiveness is a topical layer that is softer than the concrete under it and will eventually need renewing.
Coatings go the other direction. A thick epoxy or polyaspartic build with flake or metallic pigment hides the slab and gives you color, but it is a different product with a different look. If you want to see concrete, you want grind and seal or polish. If you want to stop seeing concrete, look at flake systems or metallic epoxy.
How a grind and seal is installed, step by step
The details change with the slab and the sealer, but a well-run job follows this order. Skipping the early steps is the main reason sealed floors fail.
Walk the slab and test moisture
Before anything is ordered, the floor is inspected for cracks, joints, spalls, oil, old coatings and patched areas. Moisture is tested, using in-situ relative humidity probes (ASTM F2170), calcium chloride kits (ASTM F1869) or both, because the answer decides which sealer family is even allowed.
Coarse grind to strip and open the surface
Planetary grinders with metal-bond diamond segments cut through paint, mastic, curing compounds and laitance, the weak, chalky skin on many slabs. This pass is what separates a real prep from an acid etch, which cannot remove any of that.
Repair cracks, joints and pits
Cracks are routed and filled with a semi-rigid epoxy or polyurea, spalls and pits are patched, and control joints are treated according to the plan agreed in writing. Repairs are ground flush so they read as lines, not bumps.
Refine the grind to the target profile
Finer metal or resin passes smooth the scratch pattern and set the surface profile the sealer needs. Thin film sealers want a lighter profile than thick ones; the data sheet for the chosen product sets the target.
Dye or tint if color is wanted
Water or solvent dyes go on the clean, open slab before sealing. Dye is a translucent color, so it enhances the concrete rather than covering it, and any sample should be tested on your own slab first.
Clean to bare, dust-free concrete
Dust is vacuumed with HEPA-class equipment and the floor is wiped or damp-cleaned as the manufacturer specifies. Any dust left behind becomes a bump under the sealer.
Apply the sealer in thin, even coats
Most clear systems go on in two or more coats by roller or microfiber applicator, with recoat windows set by the product and the temperature. Sheen is chosen here, and anti-slip additive is added to the final coat where wet traffic is expected.
Cure, then return to service in stages
Foot traffic usually comes first, light use next, and vehicles or heavy rolling loads last. Fast-curing sealers return to service sooner than water-based acrylics; the specific times depend on the product and the weather.
Diamond grinding and the CSP profile
Grinding does two jobs at once: it cleans the slab and it sets the texture the sealer will grip. That texture is measured on the ICRI 310.2R scale of concrete surface profiles, CSP 1 (nearly flat) through CSP 10 (very rough, added in the 2013 revision). Industry guidance puts thin clear sealers and thin films at roughly CSP 1 to 3, and thicker high-build coatings at around CSP 3 to 5. Check the product data sheet; it names the range, and a good installer works to it.
Tooling matters too. Coarse metal-bond diamonds cut quickly and leave deep scratches; finer metal and resin diamonds remove those scratches in stages. On a grind and seal the finishing grit is typically much coarser than on a polished floor, which is part of why it costs less machine time and shows a more matte, natural surface even before the sealer goes on.
Dust control is part of the process, not an extra. Grinders should run with attached vacuums, and occupied homes, kitchens and offices should expect HEPA-class collection. If a bid says nothing about dust, ask.
We grind every slab and never acid etch; grinding is dry, removes coatings and laitance, and can be repeated to the profile you need
Light shot blasting reads around CSP 3, rougher than most thin clear films want, so it is not the usual choice for a see-through finish
Edges and corners need hand grinders; check that the scope covers them
Surface profile (ICRI CSP) and what uses it
12345678910
Diamond grinding typically reaches CSP 1 to 2
Thin sealers and thin-film coatings: CSP 1 to 3
Thicker build systems: CSP 3 to 5
Based on trade summaries of the ICRI Concrete Surface Profile scale (CSP 1 smoothest, CSP 10 roughest). The manufacturer sets the exact profile for each product.
Sealer types: penetrating vs film-forming
"Sealer" covers very different chemistry. The two families behave differently on the slab, and choosing between them is the biggest decision in the job. Sheen follows: matte or satin hides scuffs and dust, gloss shows every scratch and can be slick when wet. For wet areas ask about an anti-slip additive and DCOF numbers; ANSI A326.3 sets 0.42 for level interior wet areas, but the standard itself calls the number a comparison, not a prediction of slipping. Dye or tint goes under the sealer and enhances the slab without hiding patches.
Penetrating sealers and densifiers
Silicate and lithium densifiers react with the concrete to form calcium silicate hydrate, which lowers porosity, improves abrasion resistance and cuts dusting. They leave no film, stay vapor permeable and keep the look natural, but they add little water repellency or stain protection.
Water-based acrylic
The entry film. Lower VOCs, faster drying and breathable, with a satin to gloss look. It usually needs earlier reapplication and resists tire marking and chemical staining less well than harder films, so it suits light-use interior rooms.
Solvent-based acrylic
Gives deeper color and a harder surface than water-based acrylic, but carries higher VOCs, cures more slowly and has stricter application conditions. It is not breathable, so it needs the same moisture check as the harder films.
Water-based urethane
A dense film that is more durable than acrylic. Aliphatic versions resist UV yellowing; aromatic versions can yellow in sunlight and are better kept indoors. A common choice for workshops and back-of-house floors, and it is vapor-blocking.
Epoxy-based clears
A two-part, impervious film that resists oil, solvents, acids and impact once cured. It can peel or blister if applied to damp concrete, and a high-gloss epoxy can be slick when wet unless texture is added.
Polyaspartic and aliphatic urethane topcoats
Fast recoat windows, short return to service, UV stability and resistance to yellowing, and they can be applied in thicker layers than most epoxies or urethanes. The short working time demands an experienced crew, and the film is vapor-blocking.
Penetrating sealer or film-forming sealer?
Penetrating densifiers and sealers
React inside the pores; the slab stays breathable
Nothing on top to peel, wear through or yellow
Natural, matte look; dust-proofing rather than gloss
Usual choice when moisture readings are high
Reapplication is a soak-in, not a strip-and-recoat
Water-based acrylic breathes but needs earlier reapplication
Solvent acrylic is not breathable; epoxy can blister on damp slabs
Aliphatic urethane and polyaspartic hold color in sun
A wearing layer that is renewed on a schedule
Based on the sealer chemistry section above.
Where it fits, and the honest limits
It fits best where you want a clean, hard-wearing, low-maintenance concrete floor without the thickness, color or cost of a full coating system. It also fits when the slab is not a candidate for polishing, such as one with patched trenches, uneven finish, old adhesive staining or a soft, dusty surface.
Wear shows first in traffic lanes. Where tires turn, a chair rolls, or a cart repeats the same path, the sheen dulls and the film thins. Garage bays show it at the wheel tracks and in front of the door. Left alone, wear can reach the concrete, and then stains soak straight in.
Tire marking is a real issue on softer films. Water-based acrylics resist tire marking and chemical staining less well than harder urethane or polyaspartic films, so for a garage choose accordingly and ask the contractor about performance under warm tires.
Stains and etching are possible. A film resists spills for a while, but strong acids, some solvents and road-salt slush left on the surface can mark or dull it. Wipe up spills quickly, especially in winter when salty slush drips off cars.
Imperfect slabs stay imperfect. Grinding exposes the concrete as it is, with pits, trowel marks, patched saw-cuts, color variation and cracks. The sealer enhances that. If you cannot live with it, a coating system is the better answer, not a better sealer.
Garages with light-to-moderate use and a sealer chosen for hot-tire resistance
Basements and bonus rooms, once moisture has been tested and found acceptable for a film
Workshops, storage rooms and utility spaces that need a dust-free, wipeable floor
Cafes, bars, retail and back-of-house areas that want an exposed-concrete look
Warehouses and shops where a polish is overkill and a recoat cycle is acceptable
Diamond grinding opens the surface so the sealer can bond.
A sealer is a wearing layer, not a permanent finish
Every film-forming sealer wears away. That is not a defect; it is the design. The film takes the abuse so the concrete does not. What matters is whether the wear is even, whether you can renew it before it breaks through, and whether the installer told you so before the work began. Anyone who sells a clear sealer as maintenance-free is selling a promise the chemistry cannot keep.
Moisture and older DMV slabs
This is where grind and seal succeeds or fails in our area. The DMV has plenty of old housing: the DC Office of Planning reports that most of the city's houses predate 1940. Building scientists note that slabs in houses of that age very rarely sit on an under-slab vapor barrier, and one cannot be added underneath without breaking the slab out. Below-grade basements, including rowhouse basements, are where that matters most. Newer slabs are not immune either, especially finished basements with poor drainage.
Many film-forming sealers are vapor-blocking. Manufacturer guidance says epoxy can peel or blister on damp concrete, and that below-grade and slab-on-grade floors often need a breathable system. Local complaint threads about floors peeling on 50-year-old houses describe the same pattern, and the usual fix is to remove the film and start again.
That is why testing comes before the sealer. In-situ RH probes (ASTM F2170) read relative humidity inside the slab; calcium chloride kits (ASTM F1869) measure vapor emission mostly from the top inch or so, and ASTM has restricted that method for lightweight concrete. The sealer data sheet sets the limit that applies. If the numbers are too high, the options are a moisture-mitigating primer (often an ASTM F3010 product), a breathable penetrating sealer instead of a film, or a different floor altogether. A contractor who skips testing on a basement is gambling with your money.
Look for efflorescence (white powder), damp patches after rain, or a musty smell
Fix grading, gutters and downspouts first; no sealer overcomes a drainage problem
The two moisture tests named on this page
ASTM F2170: in-slab relative humidity
probe hole, about 40% of slab depth
Concrete slab
In-situ probes report humidity inside the slab and decide which sealer family is even allowed.
ASTM F1869: calcium chloride on the surface
sealed dish weighs the moisture it absorbs
Concrete slab
Calcium chloride kits report vapor emission mostly from the top inch; ASTM restricts the method on lightweight concrete.
Pass or fail limits come from the product being installed, not from the test. Illustration, not to scale.
Maintenance and recoat cycles
Routine care is simple. Dust mop or vacuum to remove grit, which acts like sandpaper under shoes and tires. Wet clean with a neutral-pH cleaner and a soft pad or mop. Avoid vinegar, ammonia, citrus cleaners and harsh degreasers, which can dull the film over time. Use walk-off mats at entries so the abrasive grit and salt that DMV winters throw off car tires and boots stay out of the room.
Recoat timing depends on sealer type, sheen and traffic. A light-traffic basement under a good urethane may go many years between coats. A garage with daily vehicle use or a commercial floor with constant foot traffic will need renewing sooner. Acrylics are the quickest to recoat but need it most often; harder urethanes and polyaspartics last longer between coats.
The advantage of a film is that renewal is cheap compared with starting over. If the floor is cleaned and the existing film is still sound, a maintenance coat can go on after a light scuff, without regrinding. Waiting until the film is worn through to bare concrete means more preparation and shortens the life of the whole floor, so recoat while it still looks acceptable, not after it fails.
A recoat starts the same way the first install did: a clean, lightly abraded surface.
Grind and seal compared with the alternatives
An honest side-by-side. Your slab and your use decide which row wins.
Factor
Grind and seal
Polished concrete
Epoxy or flake coating
Staining (acid or dye)
Look
Natural concrete, clear film, optional dye
Natural concrete, honed sheen, no film
Opaque color, flake or metallic
Translucent, variegated color
Hides slab flaws
Some, not cracks or patches
Little; flaws show
Most
Little; stain can highlight flaws
Wear behavior
Film wears; recoat periodically
Concrete itself wears slowly
Film wears; recoat or topcoat
Needs a sealer, which wears
Moisture tolerance
Depends on sealer: acrylic and densifier breathe; urethane and polyaspartic block vapor
Breathes; better on damp slabs
Epoxy can blister on damp concrete; test first
Penetrating stains breathe; film sealers vary
Tire marking
Water-based acrylic marks easiest; harder films resist more
Densified surface has no film to lift
Hard film; depends on topcoat
Depends on sealer
Slab condition needed
Forgiving
Sound and flat
Forgiving
Clean and open
Refresh later
Scuff and recoat
Re-polish or burnish
Recoat or overcoat
Reseal
Condensed from manufacturer guidance and general industry practice; individual products vary. See the polished concrete, flake systems and staining pages for detail on each.
What affects the cost of a grind and seal
No honest page can tell you a price without seeing the floor. Here is what moves it, so you can compare bids on equal terms.
Square footage, and how open or cut-up the floor is
Slab condition: coatings, adhesive, oil and heavy staining all add grinding time
Crack, joint and spall repair scope, which should be written down
Moisture test results and any mitigation primer they require
Sealer type, number of coats, sheen and any anti-slip additive
Dye or tint, and whether samples are needed first
Access, stairs, furniture moves and working hours (occupied homes, restaurants, off-hours work)
Dust control demands in finished spaces
Future recoating, which is a separate, smaller cost
What to ask a contractor before you sign
Good answers to these questions are specific. Vague answers are the warning.
How do you prepare the slab?
The answer should be diamond grinding, never acid etching, with crack and joint repair and edge grinding included. If etching comes up, keep looking.
Will you test moisture first?
Ask which method, where on the slab and what limit the sealer allows. A basement with no test is a red flag.
Which sealer, and why?
You want the product family, number of coats, sheen and hot-tire or chemical rating for your use, not a brand pitch.
What does maintenance look like?
A real answer covers cleaners to avoid, walk-off mats and when a recoat is realistic.
How will cracks and patches look?
Expect to see some repair lines. Ask for a sample or photos of repaired areas under the same sealer.
What is excluded?
Furniture moves, wall base, stairs, trenches, door thresholds and moisture mitigation are common extras. Get them listed.
Questions
Grind and seal questions, answered
What is the difference between grind and seal and polished concrete?
Polishing refines the concrete itself through progressively finer diamond steps and a densifier, leaving no film. Grind and seal stops earlier and finishes with a clear sealer on top. Polishing lasts longer; grind and seal is faster, more forgiving on imperfect slabs and easier to refresh.
Do I need to seal concrete after grinding?
Usually, yes. Ground concrete is open and porous, so it stains easily and keeps shedding dust. A densifier hardens the surface, while a film sealer adds stain, abrasion and chemical resistance. Polished floors are the exception, since the polishing itself closes the surface.
How long does grind and seal last?
The concrete underneath lasts for decades; the sealer film is the part that wears. Light-traffic rooms can go many years, while garages and busy commercial floors need recoats sooner. Sealer type, sheen, traffic and how well the floor is maintained all matter more than any single number.
What is the downside of sealing concrete?
A film can scuff, dull, mark under tires, and with vapor-blocking types trap moisture beneath it if the slab is damp. It also needs periodic renewal. Penetrating sealers avoid some of those problems but protect less against stains.
Will grind and seal hide cracks and stains?
Grinding removes surface paint, glue and many stains, but deep oil or rust can remain. Cracks are repaired and ground flush, though they usually stay faintly visible. If you want them hidden, a flake or metallic system is the better pick.
Can you grind and seal a basement floor?
Often, but moisture decides it. Test the slab first. If readings suit the sealer, a film can work well; if not, a breathable option such as a densifier or water-based acrylic, a mitigation primer, or a different floor may be the answer.
Is a sealed concrete garage floor safe for hot tires?
It depends on the sealer. Water-based acrylics resist tire marking less well than harder urethane or polyaspartic films, and grinding is what keeps any film bonded. Ask the contractor how the chosen product performs under warm tires.
How slippery is a sealed concrete floor when wet?
A smooth gloss finish can be slick, especially with water or oil. Matte sheens help, and an anti-slip additive adds grip. For commercial floors, ask how slip resistance is verified, for example by DCOF testing to ANSI A326.3.
How long before I can walk or drive on it?
Foot traffic is usually allowed within about a day, light use soon after, and vehicles after a longer cure. Exact times depend on the sealer, temperature and humidity, and should be stated in your estimate.
How do I maintain a grind and seal floor?
Dust mop or vacuum often, wet clean with a neutral-pH cleaner, and avoid vinegar, ammonia and harsh degreasers. Use entry mats, wipe up spills and road-salt slush promptly, and plan a maintenance coat before the film wears through.
Can you add color to a grind and seal?
Yes. Dye or tinted sealer gives a uniform or variegated tone while keeping the natural concrete look. Test a patch on your own slab first, since color reads differently on every floor.
When should I choose epoxy, polished concrete or staining instead?
Choose polishing for a flat, sound slab and the longest life, a flake or metallic system to hide the slab or add pattern, and staining for deeper color. Choose grind and seal when you want an exposed concrete look on a slab that is not perfect.